Portable dishwashers offer a flexible and efficient solution for spotless dishes, especially in spaces where a permanent installation isn’t feasible. Whether you live in an apartment, a rental home, or simply desire the convenience without the commitment, understanding how to properly connect your portable dishwasher to a kitchen faucet is key. This guide will walk you through each step, ensuring a secure, leak-free setup so you can enjoy the ease of automated dishwashing.
Understanding Your Portable Dishwasher
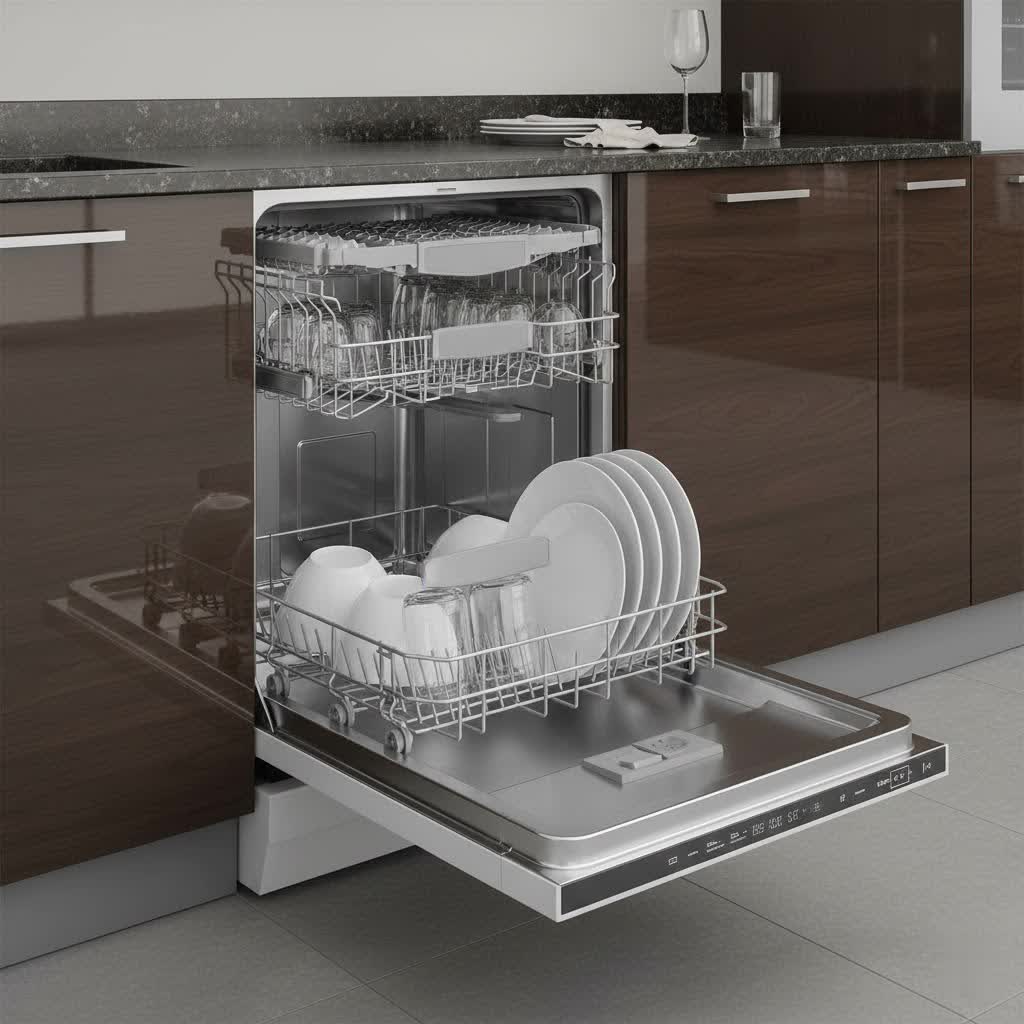
Portable dishwashers are ingenious appliances designed for mobility and convenience. Unlike their built-in counterparts, they feature wheels for easy movement and connect directly to your kitchen faucet for water supply, draining wastewater into the sink. The primary components for connection typically include a specialized faucet adapter, which replaces your faucet’s aerator, and a unicouple or hose assembly that connects the dishwasher to this adapter for both water intake and drainage. Some models might feature separate hoses, but the principle remains the same. Familiarizing yourself with these parts is the first step towards a smooth setup.
Before You Begin: Preparation Steps
A little preparation goes a long way in ensuring a hassle-free connection.
First, unpack your dishwasher and roll it into position next to your sink. Make sure there’s enough clearance for the hoses and that the dishwasher is on a level surface. Remove all internal and external packaging materials.
Next, gather your tools. While most portable dishwashers come with all necessary connectors, having an adjustable wrench, plumber’s tape (also known as PTFE tape or thread seal tape), and a small cloth for wiping up drips can be helpful.
Finally, check your faucet’s compatibility. Almost all portable dishwashers come with a universal faucet adapter designed to fit standard kitchen faucets with either internal or external threads. You’ll typically remove your faucet’s aerator to expose these threads. If your faucet has a pull-out sprayer, check your manual, as some models may require disconnecting the sprayer to prevent over-pressurization during the dishwasher’s operation.
Step-by-Step Connection Guide
Connecting your portable dishwasher is a straightforward process when approached systematically.
1. Installing the Faucet Adapter
|
Our Picks for the Best Dishwasher in 2026
As an Amazon Associate I earn from qualifying purchases.
|
||
| Num | Product | Action |
|---|---|---|
| 1 | Honeywell 18 Inch Dishwasher with 8 Place settings, 6 Washing Programs, Stainless Steel Tub, UL/Energy Star- Black |

|
| 2 | Cascade Platinum Plus Dishwasher Pods, Dish Detergent Soap, Clean Scent, 62 Count |
|
| 3 | COMFEE’ Portable Mini Dishwasher, Energy Star, Countertop, 6 Place Settings, with 8 Washing Programs, Speed, Baby-Care, ECO& Glass, Dish Washer for Dorm, RV& Apartment, White |
|
| 4 | Cascade Complete Dishwasher Pods - Fresh Scent ActionPacs, Dishwasher Detergent, Dishwasher Soap, Detergent Pods, 78 Count |
|
| 5 | Cascade Complete Dishwasher Detergent Liquid Gel, Dish Detergent, Dishwasher Soap, Citrus, 75oz |
|
| 6 | EUHOMY Countertop Dishwasher Portable with 6 Programs, 5L Built-in Water Tank for Apartments & RV, 167℉ High-Temp, No Hookup Needed, Mini Dishwasher with Baby Care, Air Dry/Quick/ECO/Fruit/Normal Mode |
|
| 7 | Kenmore 24" Premium Hybrid Tub Dishwasher - UltraWash, MoreSpace Adjustable Rack, High Temp & SmartWash - 12 Place Settings - 54 DBA - ENERGY STAR Certified - Fingerprint Resistant Stainless Steel |
|
| 8 | BLUELAND 100% Plastic-Free Dishwasher Detergent Tablets, 60 Count, Free & Clear, Eco-Friendly Dishwashing Pods, Natural, USDA Certified biobased |
|
| 9 | Sharp SDW6504MS Stainless Steel Dishwasher, 24-inch Pocket Handle, 52 dB, Hybrid Tub, 12 Place Settings, 5 Cycles, Heated Dry |
|
| 10 | COMFEE’ Countertop Dishwasher, Energy Star Portable Dishwasher, 6 Place Settings & 8 Washing Programs, Speed, Baby-Care, ECO& Glass, Dish Washer for Dorm, RV& Apartment, Black |
|
The faucet adapter is the bridge between your sink and your dishwasher. Start by unscrewing and removing the existing aerator from the end of your kitchen faucet. This might require a gentle turn by hand or using a wrench if it’s too tight. Once removed, identify which side of the provided dishwasher faucet adapter fits your faucet’s exposed threads. Many adapters are dual-threaded to accommodate various faucet types.
For a watertight seal, it’s a good practice to wrap the threads of your faucet with a few layers of plumber’s tape before screwing on the adapter. This helps prevent leaks. Screw the adapter onto the faucet securely, ensuring it’s hand-tight, but avoid over-tightening which could damage the threads. If your dishwasher kit includes washers for the adapter, be sure to install them as instructed.
2. Connecting the Unicouple (Hose Assembly)
The unicouple combines the water supply and drain lines into one convenient connector. Locate the unicouple hoses, usually stored in a compartment at the back of the dishwasher. Extend them fully, making sure they aren’t kinked or twisted, as this can impede water flow.
To attach the unicouple, you’ll typically depress a locking collar or thumb release on the connector. While holding it down, lift the unicouple onto the newly installed faucet adapter. You should feel it snap securely into place. Release the locking collar or thumb release, and then give the unicouple a gentle tug to confirm it’s firmly seated and won’t detach under water pressure.
3. Establishing Water Supply and Drainage
Proper water supply and drainage are critical for your dishwasher’s operation. Begin by turning on your kitchen’s hot water faucet until the water runs hot. This flushes any cold water from the hot water line, ensuring your dishwasher receives adequately heated water for optimal cleaning. Most dishwashers require hot water between 120°F and 150°F. Once hot, turn off the faucet.
Now, with the unicouple connected, slowly turn the hot water faucet on all the way. Check carefully for any leaks around the faucet adapter and the unicouple connection point. A small drip might be resolved by ensuring the adapter and unicouple are tightened correctly. If a leak persists, you may need to reapply plumber’s tape or check for damaged washers.
Ensure the dishwasher’s drain hose component of the unicouple is positioned so that wastewater can flow freely into your sink. It should rest securely in the sink basin without blocking the drain.
4. Plugging into Power
With the water connections secure, it’s time for power. Plug the dishwasher’s power cord into a grounded 3-prong electrical outlet. It is paramount to connect your dishwasher to a dedicated, grounded outlet.
“Never use an extension cord or an adapter plug with your portable dishwasher. This can pose serious electrical shock or fire hazards.” – Dishwasher Safety Expert, Home Appliance Institute
Failure to follow these instructions can lead to severe safety risks.
First Wash Cycle & Troubleshooting Common Issues
Once connected, run an empty test cycle to ensure everything is functioning correctly and to flush out any manufacturing residue. Load your dishes according to your dishwasher’s manual, add detergent and rinse aid, select a cycle, and start the machine.
Common Troubleshooting:
- Leaks at the connection: Re-check the faucet adapter for snugness and proper plumber’s tape application. Ensure the unicouple is fully engaged with the adapter.
- Low water pressure/no water: Confirm the hot water faucet is fully open and that hoses aren’t kinked.
- Dishwasher not starting: Check if the power cord is plugged in, the door is securely latched, and the correct cycle is selected.
Disconnecting Your Portable Dishwasher After Use
One of the greatest advantages of a portable dishwasher is the ability to disconnect and store it. When a wash cycle is complete, follow these steps:
- Turn off the hot water faucet.
- Unplug the dishwasher’s power cord.
- Release water pressure. Many unicouples have a pressure relief button (often red) on the hose connector. Press this button to release any built-up water pressure before disconnecting. This is a crucial safety step to prevent hot water spray.
- Detach the hoses. While depressing the locking collar/thumb release, lift the unicouple from the faucet adapter. Allow any residual water in the hoses to drain into the sink or a small bucket.
- Store the hoses back in their designated compartment on the dishwasher.
Finally, roll your portable dishwasher to its storage location, keeping your kitchen sink clear and accessible.
Tips for Optimal Performance and Longevity
To get the best out of your portable dishwasher and extend its lifespan:
- Load Properly: Refer to your manual for optimal loading techniques to ensure water and detergent reach all dishes.
- Use Quality Detergent & Rinse Aid: Hard water may require more detergent. Rinse aid helps prevent spots and streaks, especially in hard water areas.
- Clean Regularly: Periodically clean the filter, spray arms, and interior to prevent food particle buildup and odors.
- Check Water Temperature: Ensure your hot water supply is consistently within the recommended temperature range for effective cleaning.
Conclusion
Connecting a portable dishwasher to your faucet is a straightforward process that significantly upgrades your kitchen convenience. By carefully following these steps—from installing the faucet adapter and connecting the unicouple to ensuring proper water supply and power—you can quickly enjoy perfectly clean dishes. Remember to prioritize safety by always plugging into a grounded outlet and releasing water pressure before disconnecting. Embrace the flexibility and efficiency a portable dishwasher brings, making dishwashing a less daunting task in any home.
Frequently Asked Questions
Do all kitchen faucets work with portable dishwashers?
Most standard kitchen faucets with removable aerators (either internal or external threads) are compatible with the universal adapters provided with portable dishwashers. However, certain specialty faucets or pull-out sprayers may require specific adapters or temporary disconnection of the sprayer.
Can I leave my portable dishwasher connected to the faucet all the time?
While technically possible, it’s generally recommended to disconnect your portable dishwasher after each use. This frees up your sink, reduces strain on your faucet connections over time, and mitigates the small risk of leaks when the appliance is not in active use.
What should I do if my faucet adapter leaks after installation?
First, ensure the adapter is screwed on tightly but not over-tightened. Disconnect it, reapply plumber’s tape to the faucet threads, and check for any damaged washers before reattaching. If the leak persists, consult your dishwasher’s manual or a plumbing professional.
How hot should the water be for a portable dishwasher?
For optimal cleaning performance, portable dishwashers typically require hot water between 120°F and 150°F (49°C to 66°C). Running your hot water faucet before connecting the dishwasher helps ensure the unit receives hot water from the start of the cycle.
Is it safe to use an extension cord with a portable dishwasher?
No, it is generally unsafe and strongly discouraged by manufacturers to use an extension cord or an adapter plug with a portable dishwasher. These appliances draw significant power, and extension cords can overheat, posing a risk of fire or electrical shock. Always plug the dishwasher directly into a grounded 3-prong outlet.