Accidentally leaving a plastic item near or on a hot heating element is a common household mishap that can quickly turn into a sticky, smelly, and potentially hazardous situation. Whether it’s a forgotten container in the oven, a rogue bottle in the dishwasher, or a misplaced item in the dryer, melted plastic not only creates an unsightly mess but also poses risks from toxic fumes and potential appliance damage. Don’t panic; with the right approach and strict adherence to safety, you can often remedy the situation yourself. This comprehensive guide will walk you through the safest and most effective methods to remove melted plastic from various heating elements, ensuring your appliance is clean and safe to use again.
The Dangers of Melted Plastic on Heating Elements
Encountering melted plastic on a heating element is more than just an inconvenience; it presents several significant hazards that require immediate attention. Understanding these dangers underscores the importance of a cautious and thorough cleaning process.
Firstly, when plastic melts or burns, it releases a cocktail of toxic fumes into the air. These fumes, often referred to as Volatile Organic Compounds (VOCs), can include highly hazardous chemicals depending on the type of plastic. Inhaling these fumes can lead to immediate symptoms like irritation of the eyes, nose, and throat, dizziness, and headaches. Prolonged exposure or exposure to certain types of burning plastic (like PVC, which releases dioxins) has been linked to more severe health issues, including respiratory problems such as aggravated asthma or chronic obstructive pulmonary disease, neurological damage, reproductive issues, and even an increased risk of cancer. Proper ventilation is paramount to minimize these health risks.
Secondly, melted plastic on a heating element can become a fire hazard. While the plastic itself might not readily ignite, it can smolder and produce significant smoke. The presence of flammable plastic residue on an active heating element can potentially lead to a fire, especially if left unaddressed.
Lastly, the melted plastic can damage your appliance. The residue can adhere strongly to the heating element, potentially impacting its efficiency or even causing it to malfunction. Left uncleaned, it can also impart unpleasant odors or tastes to food cooked in an oven or transferred to dishes washed in a dishwasher.
Essential Safety Precautions
Before you even think about tackling that melted plastic, prioritizing safety is non-negotiable. Skipping these crucial steps could lead to electric shock, burns, or harmful fume inhalation.
Always disconnect the appliance from its power source. This is the single most important step. Unplug the appliance from the wall outlet or turn off the corresponding circuit breaker in your home’s electrical panel. Never attempt to clean a heating element while the appliance is still connected to power.
Ensure proper ventilation. Open windows and doors in the area, and turn on exhaust fans, range hoods, or any other ventilation systems available. If possible, use a portable fan to help direct fumes out of the room. Melted plastic often releases unpleasant and potentially toxic odors, so good airflow is essential to dissipate them.
Wear appropriate protective gear. At a minimum, wear sturdy heat-resistant gloves to protect your hands from residual heat and any sharp edges of hardened plastic. Eye protection, such as safety glasses, is also recommended to guard against flying debris. If the plastic is actively smoking or the smell is strong, consider wearing a respirator or a face mask designed to filter fine particles and chemical fumes.
Allow the element to cool completely (unless using a specific warm method). For most initial scraping attempts, it’s safer if the element is cold. Hot plastic is often gooey and harder to remove cleanly, and a hot element poses an immediate burn risk. However, there are specific methods that involve gentle reheating, which will be discussed next.
Step-by-Step Removal Methods
The approach you take to remove melted plastic largely depends on the type of appliance, the extent of the melt, and whether the plastic has hardened or remains gooey. Here are two primary methods, along with post-removal steps.
Method 1: The Cold Hardening Approach
|
Our Picks for the Best Dishwasher in 2026
As an Amazon Associate I earn from qualifying purchases.
|
||
| Num | Product | Action |
|---|---|---|
| 1 | COMFEE’ Portable Mini Dishwasher, Energy Star, Countertop, 6 Place Settings, with 8 Washing Programs, Speed, Baby-Care, ECO& Glass, Dish Washer for Dorm, RV& Apartment, White |

|
| 2 | EUHOMY Countertop Dishwasher Portable with 6 Programs, 5L Built-in Water Tank for Apartments & RV, 167℉ High-Temp, No Hookup Needed, Mini Dishwasher with Baby Care, Air Dry/Quick/ECO/Fruit/Normal Mode |
|
| 3 | Honeywell 18 Inch Dishwasher with 8 Place settings, 6 Washing Programs, Stainless Steel Tub, UL/Energy Star- Black |
|
| 4 | BLUELAND 100% Plastic-Free Dishwasher Detergent Tablets, 60 Count, Free & Clear, Eco-Friendly Dishwashing Pods, Natural, USDA Certified biobased |
|
| 5 | Cascade Complete Dishwasher Pods - Fresh Scent ActionPacs, Dishwasher Detergent, Dishwasher Soap, Detergent Pods, 78 Count |
|
| 6 | Sharp SDW6504MS Stainless Steel Dishwasher, 24-inch Pocket Handle, 52 dB, Hybrid Tub, 12 Place Settings, 5 Cycles, Heated Dry |
|
| 7 | Kenmore 24" Premium Hybrid Tub Dishwasher - UltraWash, MoreSpace Adjustable Rack, High Temp & SmartWash - 12 Place Settings - 54 DBA - ENERGY STAR Certified - Fingerprint Resistant Stainless Steel |
|
| 8 | Cascade Complete Dishwasher Detergent Liquid Gel, Dish Detergent, Dishwasher Soap, Citrus, 75oz |
|
| 9 | Cascade Platinum Plus Dishwasher Pods, Dish Detergent Soap, Clean Scent, 62 Count |
|
| 10 | COMFEE’ Countertop Dishwasher, Energy Star Portable Dishwasher, 6 Place Settings & 8 Washing Programs, Speed, Baby-Care, ECO& Glass, Dish Washer for Dorm, RV& Apartment, Black |
|
This method is particularly effective for plastic that has melted but is still somewhat pliable, or for elements that can be easily cooled or removed, like oven racks. The goal is to make the plastic brittle so it can be chipped away.
To begin, ensure the appliance is completely cool and disconnected from power. Then, apply an ice pack or a bag of ice directly onto the melted plastic. Hold it in place for 15-30 minutes, allowing the cold to harden and contract the plastic. For removable items like oven racks, placing them in a freezer for a few hours can be even more effective.
Once the plastic is brittle, gently but firmly try to chip or scrape it off. Use a non-metallic tool such as a wooden spoon, a plastic scraper, a dull butter knife, or even an old credit card. For stubborn, thicker areas, a razor blade or utility knife can be used with extreme caution, holding it at a shallow angle to avoid scratching the element itself. Work slowly and methodically, collecting the plastic pieces as they come off to prevent them from falling into other parts of the appliance.
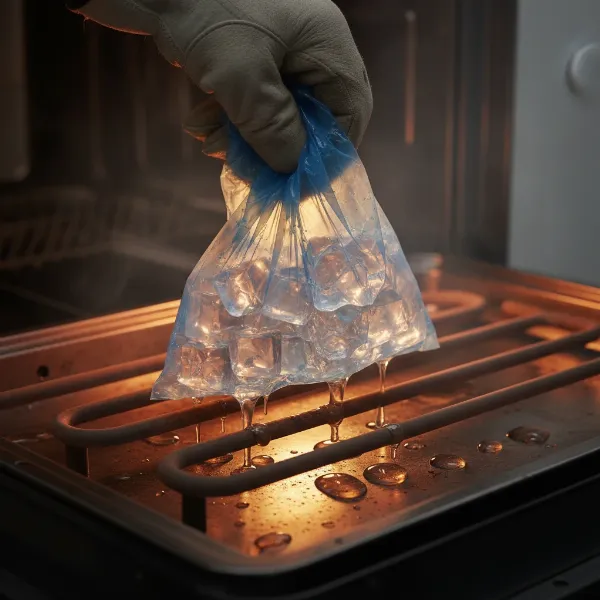 Applying ice pack to melted plastic on a heating element for easy removal
Method 2: The Gentle Reheating and Scraping Approach
For situations where the plastic is deeply embedded, the cold method isn’t feasible, or for elements that cannot be easily accessed or removed (like some dishwasher elements), gentle reheating can help soften the plastic for removal. This method requires extra vigilance and adherence to safety.
First, ensure the area is well-ventilated. With the appliance still disconnected from power, perform as much preliminary scraping as possible using the cold method or manual force if the plastic is thick enough to chip.
For ovens: Turn the oven on to its absolute lowest temperature setting (e.g., 150-200°F or 65-95°C) for only a few minutes. The goal is to soften the plastic, not to burn it further. Once you see the plastic begin to soften and become gooey, turn off the oven immediately and disconnect power. While the element is still warm, carefully use a wooden spoon or non-metallic spatula to scrape away the softened plastic. Wipe the tool frequently with a paper towel to remove collected plastic.
For dishwashers: Most manufacturers suggest running a short dry cycle. For models with mechanical (dial) controls, advance the dial to the “Dry” cycle and allow it to heat for about 4 minutes. For electronic (touchpad) controls, run the shortest wash cycle with the “Heated Dry” option selected, then interrupt the cycle after about 4 minutes into the dry phase. Immediately press “Reset” or “Cancel” and unlatch the door. While the element is hot but before it becomes too cool, carefully scrape the softened plastic off with a wooden spoon or a non-metallic object. Always wear heat-insulated gloves.
For electric stove coils: Turn the burner to the lowest setting. As the plastic softens, use a wooden spoon or spatula to gently scrape it off, wiping the tool with a paper towel often. Once the bulk is removed, turn off the burner and disconnect power.
Throughout this process, monitor for excessive smoke or strong fumes. If fumes become overwhelming, turn off the heat source, ventilate immediately, and consider pausing to allow the appliance to cool further before resuming.
Post-Removal Cleaning and Residue
After removing the bulk of the melted plastic using either the cold or warm method, you will likely be left with a thin residue or staining on the heating element. This stage is crucial for ensuring the element is truly clean and won’t cause future issues.
For minor residue, a paste made from baking soda and a small amount of water can be very effective. Apply the paste to the affected area, let it sit for a few minutes, then scrub gently with a non-abrasive scrubber or a damp cloth. The baking soda acts as a mild abrasive and helps absorb odors. Rinse or wipe the area thoroughly with a clean, damp cloth.
For more stubborn stains, some general-purpose oven or appliance cleaners might be considered, but extreme caution is advised, especially on the heating element itself. Always read the product label carefully to ensure it’s safe for use on heating elements and within the specific appliance type (e.g., oven, dishwasher). Ensure all chemical residues are completely wiped away before reactivating the appliance, as leftover chemicals could produce dangerous fumes or damage the element when heated.
Avoid using harsh chemical solvents like acetone (nail polish remover) directly on heating elements. While acetone can dissolve some plastics, it can also damage certain finishes and, more importantly, residual acetone on a heated element could ignite or release extremely harmful fumes. If you use it on surrounding metal or enamel surfaces (like a dryer drum interior), ensure the area is extremely well-ventilated and rinsed multiple times to remove all traces.
Some sources suggest that after removing as much plastic as possible, you can run the appliance on a high heat setting for a short duration to burn off any microscopic residue. If you choose this option, ensure maximum ventilation (all windows open, exhaust fans on high) and be prepared for lingering smoke and odor. This should only be attempted when the visible plastic is completely gone.
Appliance-Specific Considerations
While the general principles of removing melted plastic apply across appliances, there are nuances for each.
Oven Heating Elements
Oven elements (both broiler and bake elements) can be tricky due to their fixed position. The cold method is often best for oven racks, which can be removed and placed in a freezer. For the elements themselves, the gentle reheating method, followed by scraping with a wooden tool, is usually preferred. For residue on the oven floor or walls, baking soda paste is a safe and effective option. Always ensure the oven is completely cooled and unplugged before reaching inside.
Dishwasher Heating Elements
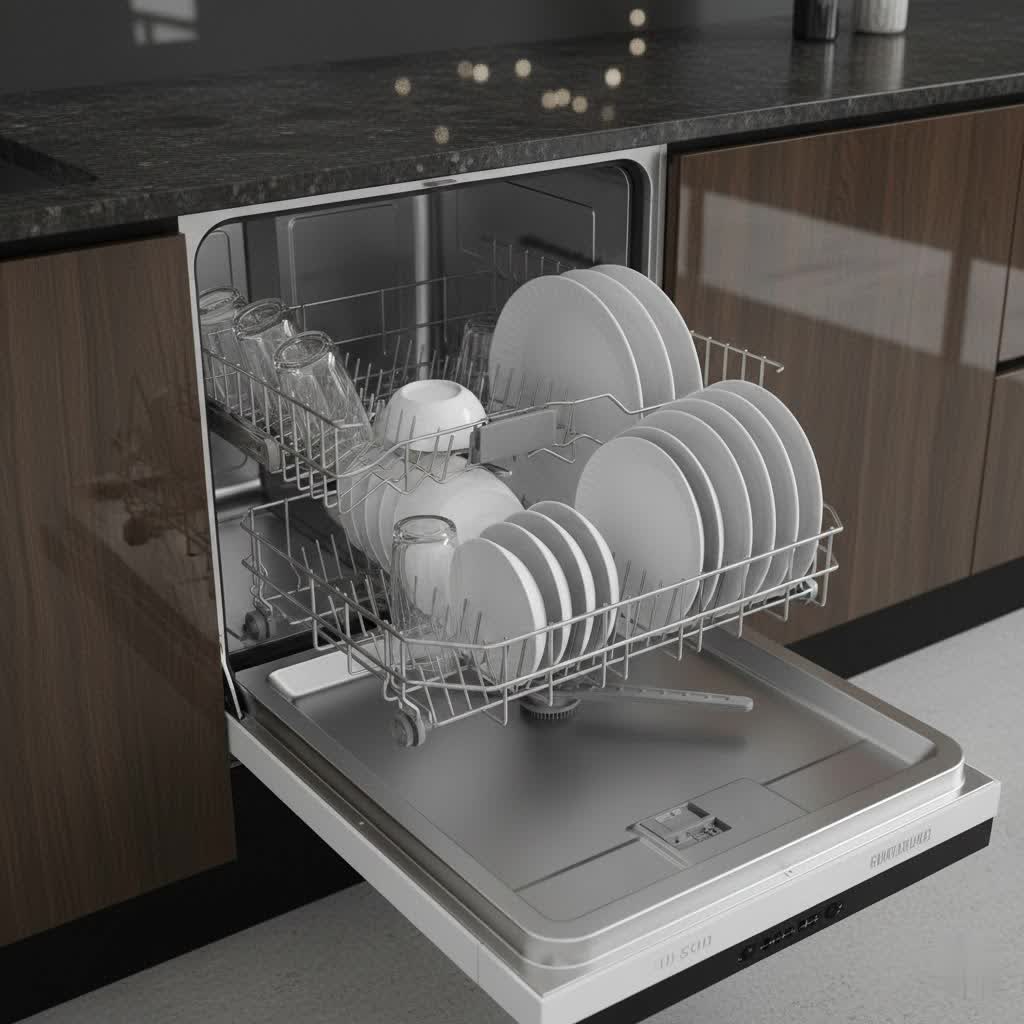
Dishwasher heating elements are typically located at the bottom of the tub. Since they are often exposed and non-removable, the gentle reheating method (using a short dry cycle) is the most common approach. It’s crucial to use only non-metallic scrapers like a wooden spoon to avoid damaging the element or the dishwasher tub. After removal, running an empty wash cycle with a dishwasher cleaner can help eliminate any residual odor.
Electric Stove Coil Burners
Similar to oven elements, electric stove coil burners can be gently reheated on the lowest setting to soften plastic. Use a wooden spatula or spoon, constantly wiping off melted plastic onto a paper towel. Be extra careful not to scratch the coil. For residue on the drip pans, the cold method might work if the pans are removable and can be frozen.
Dryer Heating Elements (and Dryer Drum)
It’s less common for plastic to melt directly onto the dryer’s internal heating element, which is usually enclosed. More frequently, plastic items melt onto the dryer drum. If plastic is on the drum, running the dryer on a regular setting for 10-20 minutes can soften it, allowing you to scrape it off with a plastic or wooden spatula. For lingering residue on the dryer drum, nail polish remover (acetone) can be used on the metal/enamel surface, but only with excellent ventilation and followed by thorough wiping with a damp, soapy cloth, then a clean wet cloth to remove all traces before using the dryer again. If you suspect plastic has melted onto the actual internal heating element, it’s best to consult a professional due to the complexity and potential hazards of accessing it.
When to Call a Professional
While many melted plastic scenarios can be resolved with DIY methods, there are times when calling a professional appliance technician is the safest and most sensible course of action.
Consider professional help if:
- The melted plastic is extensive, deeply burned, or has damaged the heating element itself.
- You are unable to safely access the affected heating element.
- You’ve tried the recommended methods, but a significant amount of plastic or a strong burning smell persists.
- You are uncomfortable or unsure about any step of the removal process.
- The appliance is not functioning correctly after your cleaning attempt.
Attempting to force the removal of stubborn plastic or operating a damaged heating element could lead to further damage, costly repairs, or even safety risks.
Conclusion
Dealing with melted plastic on a heating element can be daunting, but with a patient and safety-conscious approach, it’s a manageable task. Remember to always prioritize your safety by disconnecting power, ensuring ample ventilation, and wearing protective gear. Whether you choose the cold hardening or gentle reheating method, using the right tools and cleaning off any residue meticulously are key to restoring your appliance. By following these guidelines, you can safely remove the unwanted plastic, eliminate unpleasant odors, and get your appliance back in working order. Don’t let a small mishap compromise your home’s safety or your appliance’s longevity. A clean element is a safe and efficient element.
Frequently Asked Questions
Is melted plastic toxic?
Yes, melted plastic can release toxic fumes, including Volatile Organic Compounds (VOCs) and sometimes more hazardous chemicals like dioxins. Inhaling these fumes can cause respiratory irritation, headaches, and in severe or prolonged cases, more serious health issues. Always ensure excellent ventilation when dealing with melted plastic.
Can I use oven cleaner on melted plastic on a heating element?
Generally, it’s best to avoid strong chemical oven cleaners directly on heating elements. While some might be safe for oven interiors, they can contain harsh chemicals that could damage the element or produce hazardous fumes when heated. Stick to mechanical removal, baking soda paste, or mild detergent and water for the element itself.
How long does the melted plastic smell last?
The smell of melted plastic can linger for a surprising amount of time, sometimes even after the plastic has been removed. It depends on how much plastic melted, the type of plastic, and how well the area was ventilated and cleaned. Running empty cycles (with maximum ventilation) and using odor absorbers can help, but it might take several uses for the smell to completely dissipate.
What tools should I avoid when removing melted plastic?
Avoid using sharp metal tools (like metal knives or screwdrivers) aggressively, as they can scratch or damage the heating element and surrounding surfaces. Also, avoid using abrasive pads or steel wool directly on the element, as they can cause damage. Always opt for non-metallic, gentle scrapers like wooden spoons, plastic spatulas, or dull knives.
Can melted plastic permanently damage my appliance?
In most cases, if the melted plastic is promptly and carefully removed, the appliance will not suffer permanent damage. However, if the plastic is left on for extended periods, burns deeply, or causes severe corrosion, it could potentially damage the heating element or other internal components, requiring professional repair or replacement.