Is your old dishwasher on its last rinse cycle, or are you finally adding this modern convenience to your kitchen? While hiring a professional might seem like the easiest route, installing a dishwasher yourself is a rewarding project that many homeowners with moderate DIY experience can tackle. Imagine the satisfaction of a sparkling clean kitchen knowing you installed the appliance that made it happen! This comprehensive guide will walk you through every step of the process, ensuring a smooth and successful DIY dishwasher installation, from disconnecting the old unit to enjoying your first perfectly washed load.
Removing Your Old Dishwasher
Before you can welcome a new appliance, the old one needs to make a graceful exit. This initial phase is crucial for safety and setting up a clean workspace for your new dishwasher. Taking your time here will prevent headaches down the line.
First, prioritize safety by heading to your home’s circuit breaker and shutting off the electricity to the dishwasher. Locate the hot water supply valve, typically found under your kitchen sink, and turn off the water supply. These steps are non-negotiable to prevent electrical shocks or leaks during the process. With the power and water off, use a screwdriver to remove the front access panel near the floor of the old dishwasher. This panel usually hides the electrical and plumbing connections.
Next, it’s time to disconnect the lines. Carefully disconnect the old electrical wiring connections within the terminal box, following the manufacturer’s instructions. An adjustable wrench will help you detach the old water supply line from the dishwasher. Keep a shallow bowl or towel handy to catch any residual water that might leak out. Finally, disconnect the drain hose from the dishwasher and, if connected, from the sink tailpipe or garbage disposal unit. With all connections free, locate and remove the screws from the mounting brackets that secure the dishwasher to the underside of the countertop or adjacent cabinets. Place a drop cloth or a large piece of cardboard on the floor in front of the appliance to protect your flooring, then gently pull the old dishwasher out of its space and move it away from the work area. If your power comes from a receptacle in an adjacent cabinet, you might just unplug it, and the cord will come out with the unit.
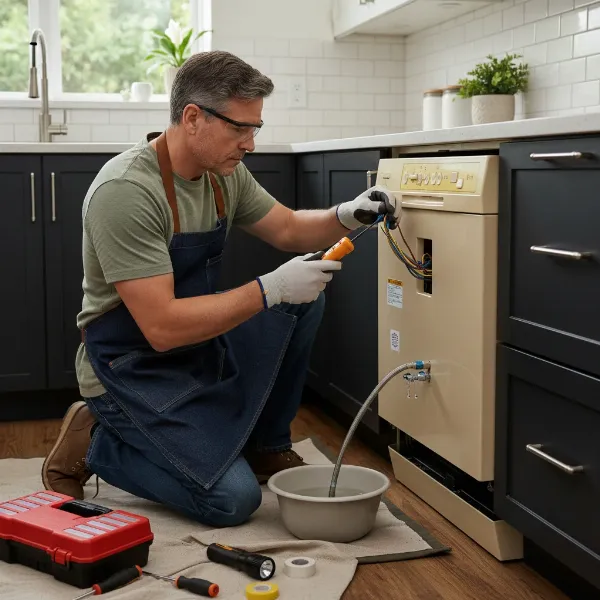 Person disconnecting an old dishwasher's water and electrical lines in a kitchen
Preparing for Your New Dishwasher
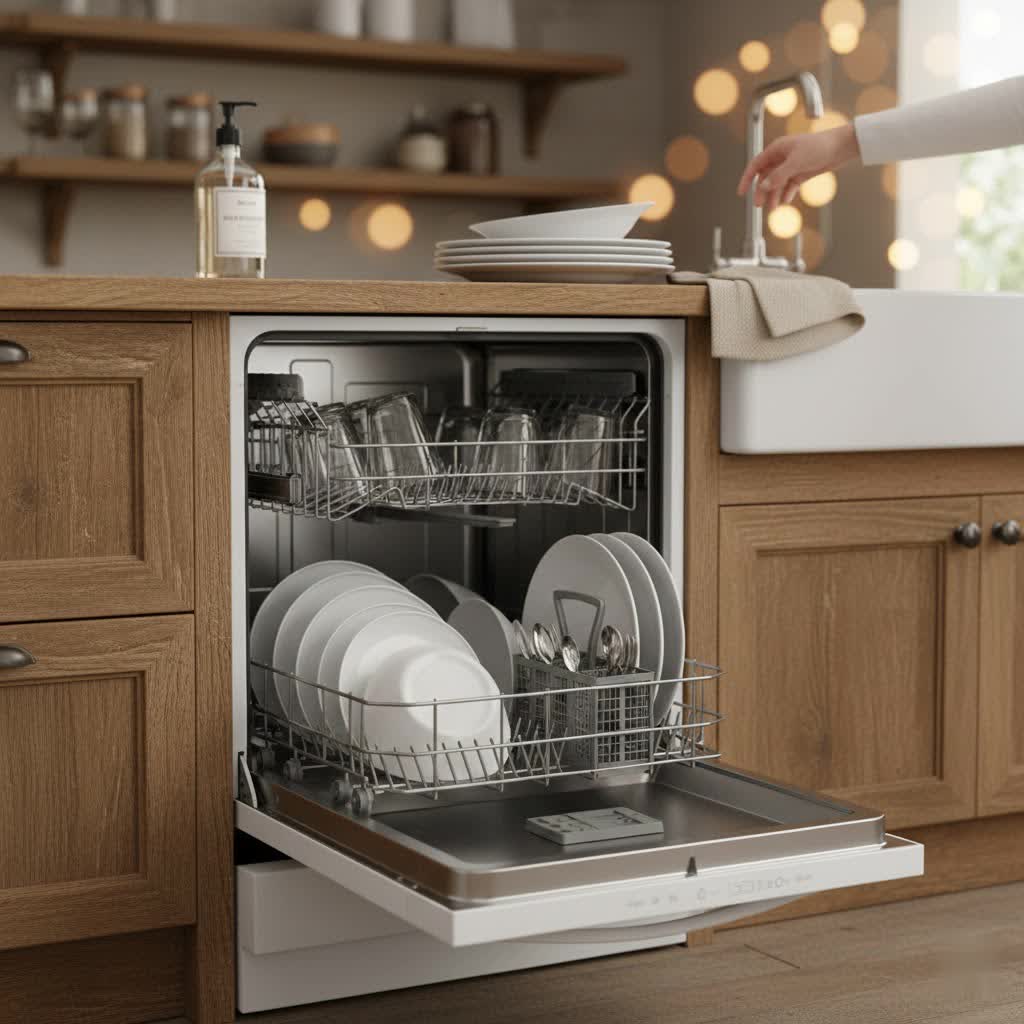
With the old unit gone, you now have a blank canvas for your new dishwasher. Proper preparation ensures all connections are accessible and the space is ready for seamless integration. This stage is all about smart setup and anticipating the next steps.
Begin by unboxing your new dishwasher near the installation location. Keep any large pieces of cardboard from the packaging to protect your kitchen floor during the upcoming steps. Gently tip the new unit onto its back; this position provides easier access to the plumbing and electrical connections you’ll be making. Locate and remove the front access panel of your new dishwasher, similar to what you did with the old unit.
Most dishwashers require a 90-degree elbow fitting for the water connection. Attach this fitting from your installation kit onto the dishwasher’s water valve, following the manufacturer’s specific instructions. This fitting helps ensure a proper, watertight seal and directs the water supply line correctly. If your installation kit includes a new water supply line and shut-off valve, now is the time to prepare those as well. Route the new supply line through the opening between the sink cabinet and the dishwasher’s designated space. Temporarily secure it to the floor with tape to prevent it from shifting when you slide the dishwasher into position.
Connecting Water, Drain, and Electrical Lines
This is where your new dishwasher starts to come to life, as you establish its vital connections to your home’s utilities. Precision and attention to detail are paramount to prevent leaks and ensure safe operation.
First, connect the new water supply line to the shut-off valve under your sink. Ensure the connection is secure but avoid overtightening. Next, address the dishwasher drain hose. Route the new drain hose through the same opening between the sink cabinet and the dishwasher space. Connect the drain hose to the sink tailpipe or the garbage disposal unit, if applicable. A critical step here is to create a “high loop” with the drain hose, securing any slack to the rear of the sink cabinet so that it arches higher than the drain inlet. This high loop is essential to prevent backwash from the sink drain into your dishwasher, which could lead to contamination or odors.
Finally, tackle the electrical connections. With the dishwasher still on its back or positioned so you can access the terminal box, use wire nuts to connect the new wiring. Always follow the color-coding instructions in your dishwasher’s installation guide – typically black to black (hot), white to white (neutral), and green to bare copper (ground). Ensure all connections are tight and secure, then carefully tuck them into the terminal box and replace its cover.
> “While DIY dishwasher installation is manageable, never rush the electrical connections. Double-check your wiring against the manufacturer’s manual – getting this right is critical for safety and appliance longevity.” – John Smith, Master Plumber & Electrician
 Connecting water, drain, and electrical lines during DIY dishwasher installation
Positioning, Leveling, and Securing Your New Dishwasher
With all the necessary connections made, it’s time to carefully slide your new dishwasher into its permanent home and ensure it’s perfectly aligned and stable. This step influences both the aesthetics and the functional longevity of your appliance.
Carefully tip the dishwasher upright and gently slide it into the cabinet opening. As you push it back, be mindful not to pinch or crimp any of the connected lines. Once the dishwasher is roughly in place, check that the front of the unit is flush with your kitchen cabinet fronts. This creates a seamless, built-in look. Now, use a level to ensure the appliance is perfectly level and plumb (vertically straight). Proper leveling is crucial for the dishwasher to drain correctly and for the racks to slide smoothly.
Adjust the leveling legs, typically found in each corner at the bottom of the dishwasher, by turning them clockwise or counter-clockwise until the unit is perfectly level. Once level, tighten any locknuts on the legs to secure their position. Finally, use the included mounting brackets to secure the dishwasher to the underside of your countertop or to the adjacent cabinet sides. Screw the brackets into place, ensuring the dishwasher is firmly anchored and won’t tip or shift during operation. Replace the front access panel you removed earlier.
Testing Your Dishwasher for Optimal Performance
The moment of truth has arrived! Before you declare the job done, a thorough test run is essential to confirm everything is working correctly and, most importantly, that there are no leaks.
Turn the water supply back on at the shut-off valve under your sink, and then restore power to the dishwasher at the circuit breaker. Open the dishwasher door and visually inspect all your connections – water, drain, and electrical – for any immediate signs of leaks or issues. Next, run a short wash cycle, ideally an empty one. While the cycle runs, pay close attention to the connections. Feel for drips around the water supply line and drain hose connections. Listen for any unusual noises that might indicate an obstruction or improper installation. Check under the sink for any water accumulating.
If you observe any leaks, immediately shut off the water and power, then tighten the corresponding connections. If the dishwasher isn’t filling with water, recheck the water supply valve to ensure it’s fully open. If it’s not turning on, verify the electrical outlet and breaker. A successful test run, free of leaks and operational issues, means your DIY dishwasher installation is complete, and you’re ready to enjoy sparkling dishes!
Conclusion
Installing a dishwasher yourself can seem daunting at first, but by systematically following these steps – from safely removing the old unit and meticulously preparing the new one, to carefully connecting utilities, leveling, and securing, then finally testing – you can achieve a professional-quality installation. This DIY approach not only saves you money but also provides a deeper understanding of your home’s plumbing and electrical systems. Embrace the challenge, enjoy the process, and revel in the satisfaction of a job well done. Are you ready to take on this home improvement project and transform your kitchen?
Frequently Asked Questions
What tools do I need to install a dishwasher?
|
Our Picks for the Best Dishwasher in 2026
As an Amazon Associate I earn from qualifying purchases.
|
||
| Num | Product | Action |
|---|---|---|
| 1 | Cascade Platinum Plus Dishwasher Pods, Dish Detergent Soap, Clean Scent, 62 Count |

|
| 2 | Sharp SDW6504MS Stainless Steel Dishwasher, 24-inch Pocket Handle, 52 dB, Hybrid Tub, 12 Place Settings, 5 Cycles, Heated Dry |
|
| 3 | Cascade Complete Dishwasher Pods - Fresh Scent ActionPacs, Dishwasher Detergent, Dishwasher Soap, Detergent Pods, 78 Count |
|
| 4 | COMFEE’ Portable Mini Dishwasher, Energy Star, Countertop, 6 Place Settings, with 8 Washing Programs, Speed, Baby-Care, ECO& Glass, Dish Washer for Dorm, RV& Apartment, White |
|
| 5 | Honeywell 18 Inch Dishwasher with 8 Place settings, 6 Washing Programs, Stainless Steel Tub, UL/Energy Star- Black |
|
| 6 | COMFEE’ Countertop Dishwasher, Energy Star Portable Dishwasher, 6 Place Settings & 8 Washing Programs, Speed, Baby-Care, ECO& Glass, Dish Washer for Dorm, RV& Apartment, Black |
|
| 7 | BLUELAND 100% Plastic-Free Dishwasher Detergent Tablets, 60 Count, Free & Clear, Eco-Friendly Dishwashing Pods, Natural, USDA Certified biobased |
|
| 8 | Cascade Complete Dishwasher Detergent Liquid Gel, Dish Detergent, Dishwasher Soap, Citrus, 75oz |
|
| 9 | Kenmore 24" Premium Hybrid Tub Dishwasher - UltraWash, MoreSpace Adjustable Rack, High Temp & SmartWash - 12 Place Settings - 54 DBA - ENERGY STAR Certified - Fingerprint Resistant Stainless Steel |
|
| 10 | EUHOMY Countertop Dishwasher Portable with 6 Programs, 5L Built-in Water Tank for Apartments & RV, 167℉ High-Temp, No Hookup Needed, Mini Dishwasher with Baby Care, Air Dry/Quick/ECO/Fruit/Normal Mode |
|
You’ll typically need basic hand tools like screwdrivers (Phillips and flathead), adjustable wrenches, pliers, a level, and a utility knife. An installation kit, which includes a 90-degree elbow fitting and a water supply line, is often required and sold separately.
How long does it take to install a dishwasher yourself?
For someone with moderate DIY experience, installing a dishwasher usually takes between 2 to 4 hours. This duration can vary based on whether you’re replacing an existing unit or installing a new one from scratch, and your comfort level with plumbing and electrical tasks.